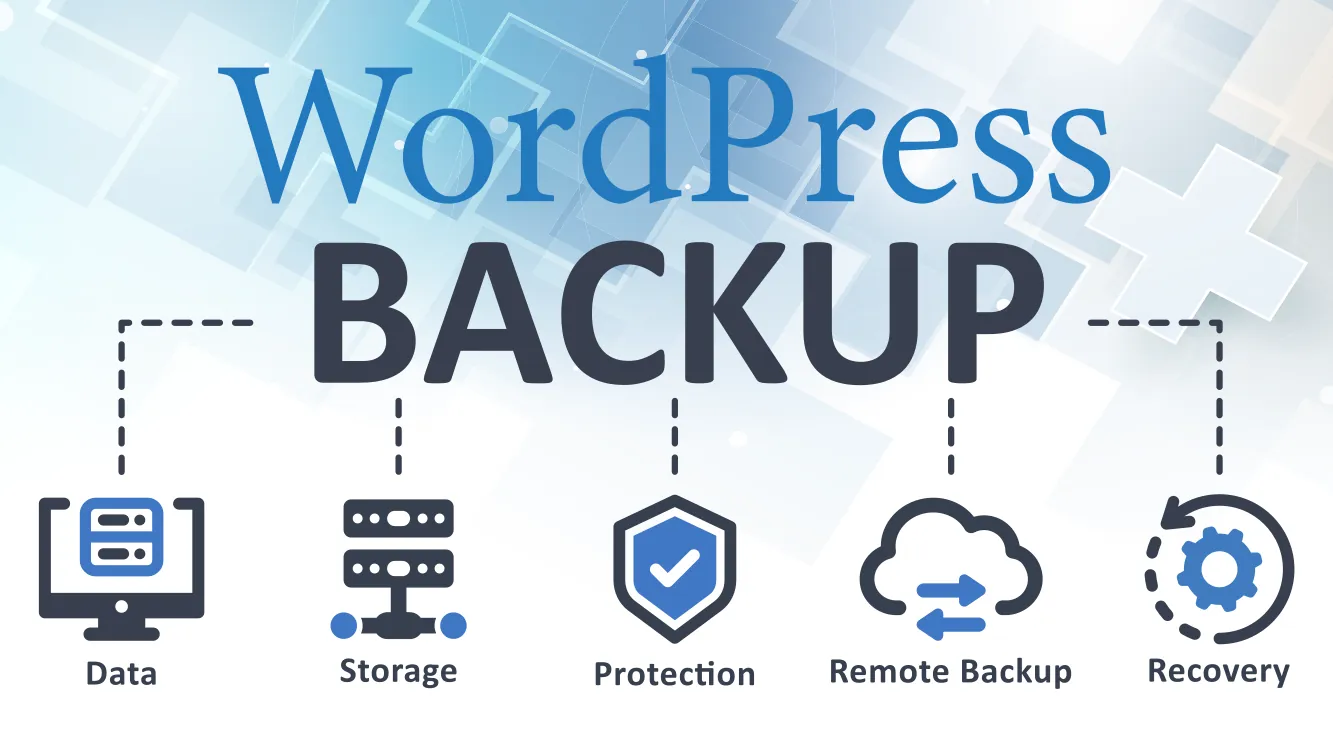
You put a lot of time and energy into your WordPress site, so it is essential to back it up. Assume your WordPress instance could fall over at any moment due to a hardware failure or ransomware attack. If you keep automatic nightly backups, you should only lose a day’s worth of work (at most) if something goes wrong.
I have had good luck with the UpdraftPlus plugin, so I will use it for this tutorial. UpdraftPlus allows you to store your backup in various locations, including Google Drive, AWS S3, and Dropbox. This tutorial assumes you are running a stand-alone WordPress (.org) instance and have admin access. Let’s get started!
Install UpdraftPlus
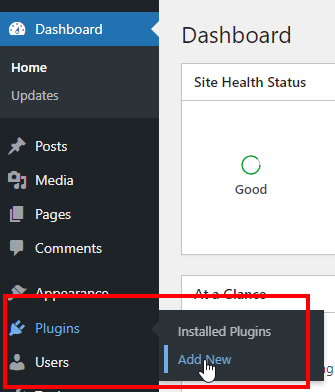
Log in to the WordPress console and click “Plugins” from the left-hand menu.
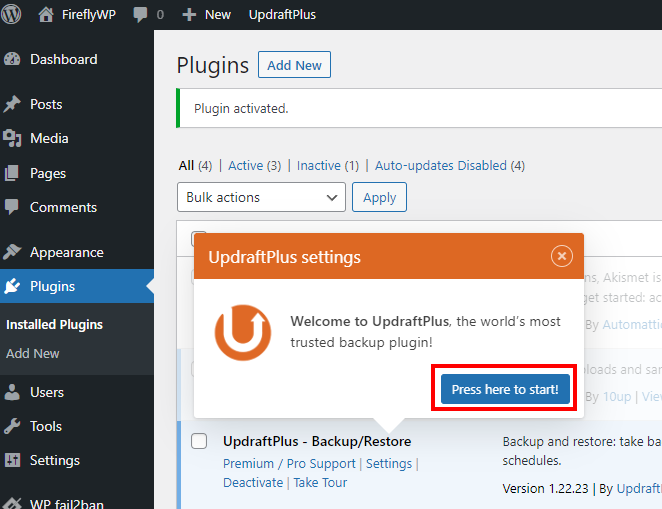
Find the search bar and enter “updraft.” The first result should be “UpdraftPlus WordPress Backup Plugin.” Click “Install Now” and then “Activate” when it finishes installing. WordPress will forward you to the plugins page, and a “UpdraftPlus settings” dialog should be floating on top.

Updraft back up settings
If all went well with the installation, you should see a UpdraftPlus “Press here to start!” button on the plugin screen.
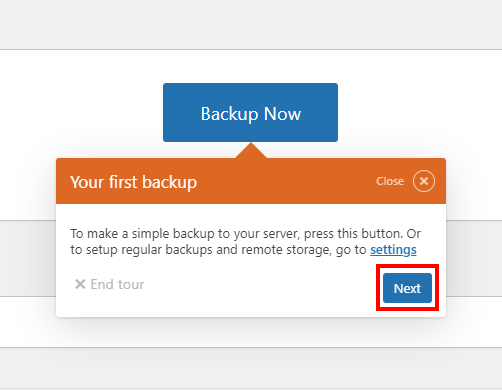
Click “Press here to start!” and “Next” to set up your first backup.
By default, Updraft Plus will retain two backups of your files and database. You can increase this value to seven days if you have a small site and plenty of storage. This allows you to restore from an older backup in case the most recent backups have problems. Storage is relatively cheap, and the extra backups will help ensure your content is safe.
Under “Files backup schedule” and “Database backup schedule,” choose how often you want to backup. What you choose here will depend on how often you update your site. I am currently making daily updates to this site, so I chose to back up the files and database daily and retain seven copies.

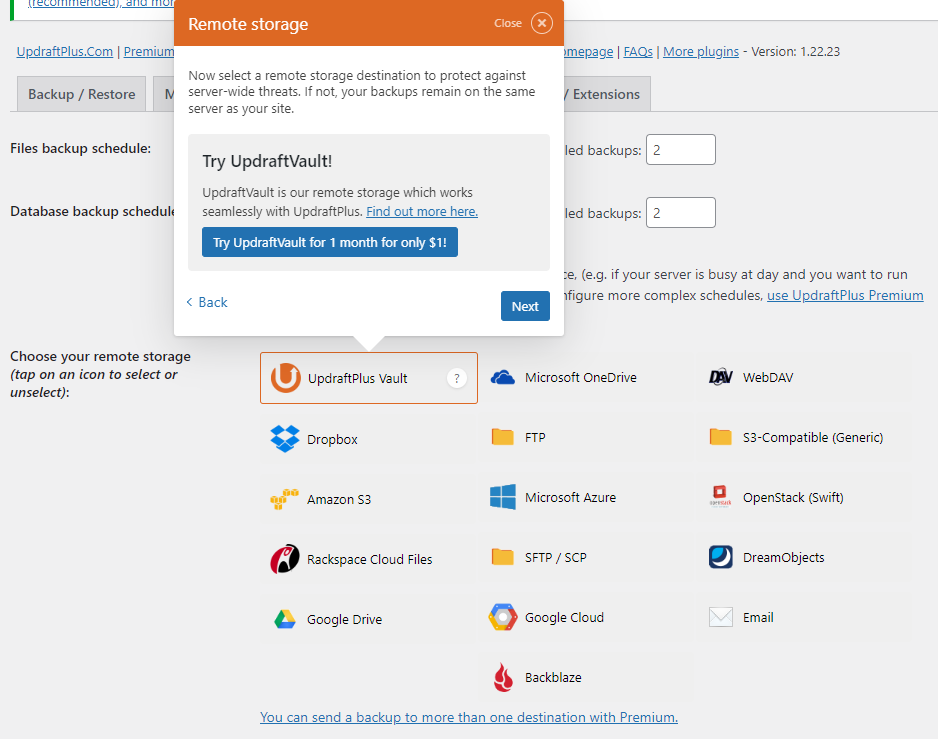
Configure your remote backup storage
You shouldn’t store your backups on the same server as your WordPress site because if it fails, your backups are gone too. Please pick a remote storage destination where your backups will be sent. UpdraftPlus supports several options, including:
- UpdraftPlus Vault
- Dropbox
- Amazon S3
- Google Drive
- Microsoft OneDrive
- Microsoft Azure
- SFTP
- Backblaze
You may already have an account with one of these storage providers. If not, set one up and save your credentials. Updraft will need these credentials to upload your backups. I have an AWS account, so I use Amazon S3.
Avoid Email and FTP. They are unencrypted protocols, and a full-site backup will quickly become too large for an email.
Select the remote storage provider you have chosen and enter the required credentials. I am using AWS S3, so I had to provide an S3 access key, secret key, and S3 location. The required credentials will vary depending on the remote storage option you choose. UpdraftPlus will allow you to test your settings in many cases to ensure it can write a file to your provider using the supplied credentials.
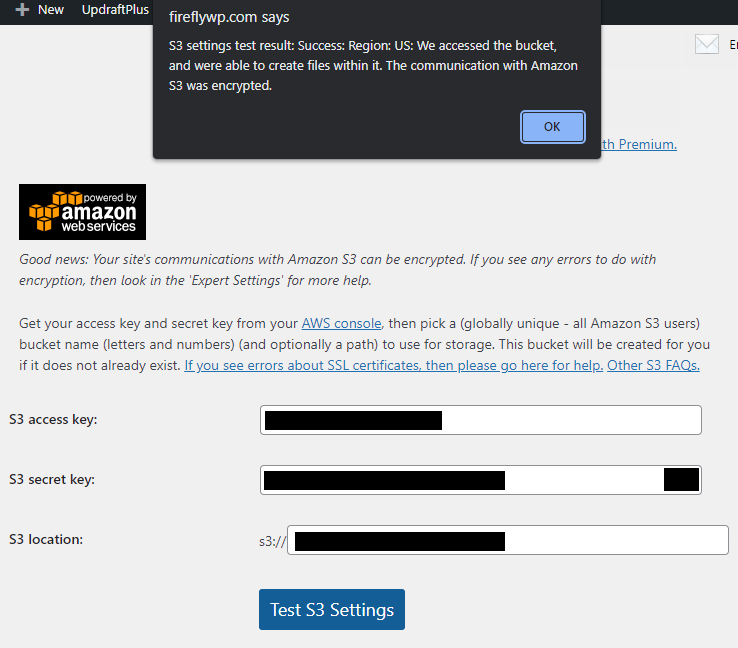
If UpdraftPlus confirms it can write to your remote storage service, you have finished the most challenging part and are almost done.
Let’s finish up!
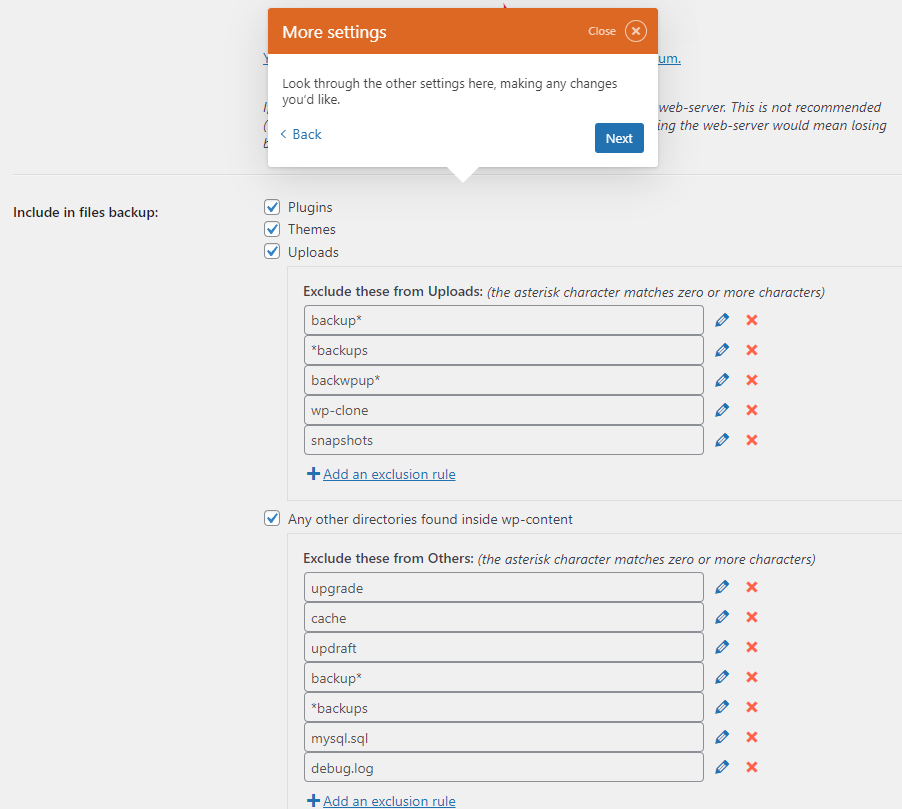
Review what will be included in your backup. Ensure Plugins, Themes, Uploads, and “Any other directories found inside wp-content” are checked. The default exclusions should be fine.
If you like, you can set up email notifications but for now, click “Save Changes” to save your configuration.
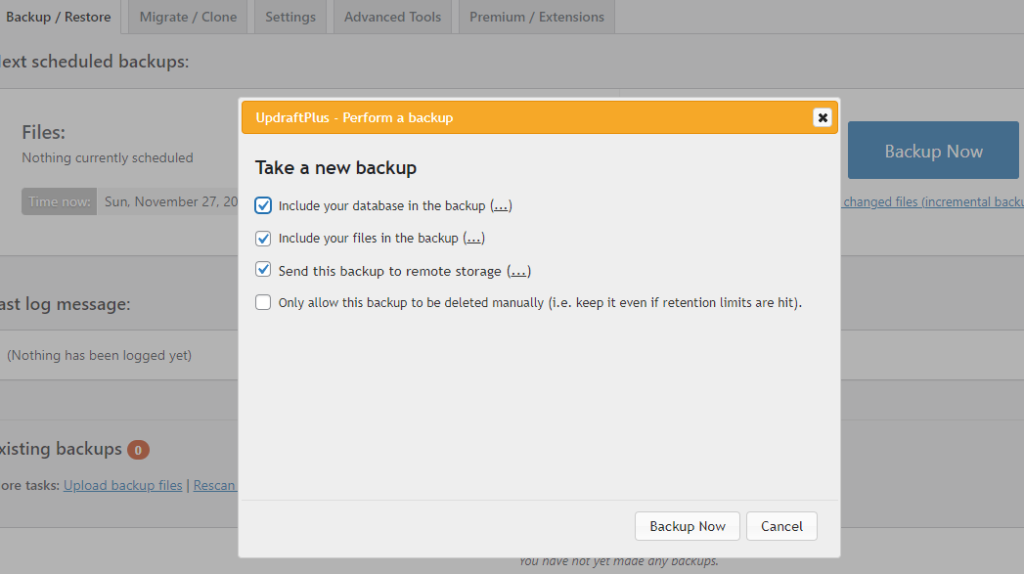
Let’s make your first backup!
Click the “Backup / Restore” tab and “Backup Now.” The default options under “Take a new backup” should be fine, so click “Backup Now.”
If everything goes well, you should briefly see a status bar indicating the backup progress. This will probably take a little longer on established sites with lots of content.
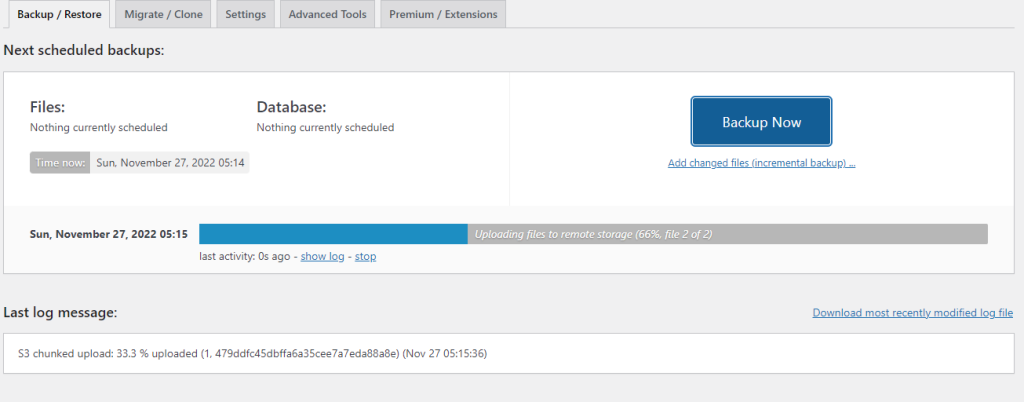
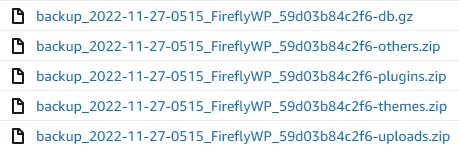
UpdraftPlus will tell you when your backup is complete if all goes well. Once your first backup is finished, log into your storage provider (I.e., Google Drive) and verify that you have some files there. You should see roughly five files prefixed with “backup,” the current date, and the name of you site
How to restore
Follow these steps to restore your website after a failure:
- Create a new WordPress instance. If you need help with this, click here.
- Install the UpdraftPlus plugin
- Open the UpdraftPlus settings, and provide the credentials to the backup on the “Settings” tab.
- Click the “Backup/Restore” tab and then scroll to the bottom and click “Rescan remote storage under “Existing backups.”
- At this point, you should see the most recent backups you’ve made to your remote storage. Click “Restore” on the most recent backup and follow the prompts.
That’s it! Your future self will thank you for backing up.
Leave a Reply