This beginner-focused tutorial will teach you how to build a custom WordPress website without code. You’ll learn how to use the new WordPress full-site editing interface to give your site a unique layout and style that’s all your own.
Setup WordPress
There are several ways to set up WordPress, but I prefer the two options below.
Local is an excellent option if you want to run WordPress on your local computer for testing, following tutorials, or developing themes and plugins. Go to localwp.com, click “Download,” Choose your platform, fill in their form, and launch the installer once it’s downloaded. That’s it!
If you want to run a production version of WordPress that is available to the world, I recommend a VPS droplet on DigitalOcean. I wrote an article detailing how to setup WordPress on DigitalOcean in detail here.
Log in to WordPress
Once WordPress is running, log in using the URL domain followed by “wp-login.php,” I.e., “nature42.com/wp-login.php.” If you are using Local, it will provide a link on the console screen you can use to open the login screen. After you log in successfully, you should see the WordPress dashboard.
Create Some Posts
Before you start customizing the look and feel of your WordPress site, it helps to create at least six filler posts with featured (cover) images. These posts will help you see how your home page looks as you customize it. You can use some filler text generated by ChatGPT or loremipsum.io.
To create a new post, from the top of the WordPress dashboard, click “+ New” and then “Post.”

Give your new post a title, add your filler text, a featured image, and an excerpt. The new WordPress default theme, Twenty Twenty-Three, will use all four items when it lists each post on your home page.
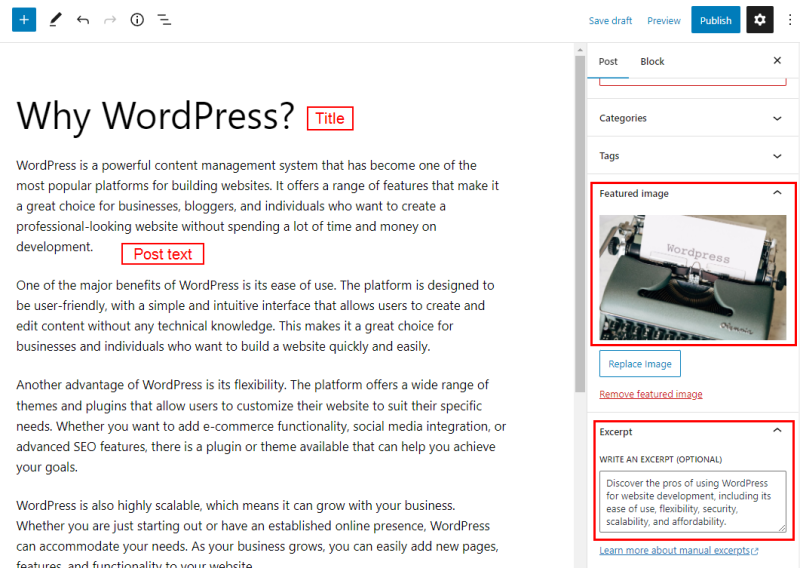
Unsplash.com is an excellent resource of free-to-use photos for your post’s featured image. The lowest resolution option on Unsplash will look great on a web page. Depending on your final design, it is usually a good idea to decide if you will use landscape or portrait images and stick with one or the other. Unsplash allows you to filter on either orientation. To upload your image, drag it from the folder where you downloaded it to the gray box under “Featured image.”
Add a page
In addition to adding a few posts, it is a good idea to add at least one page, such as an “about” page. The main difference between a post and a page is that a page is attached to the navigation menu. Adding a page will allow you to see how pages and the navigation menu look in your design.
The Twenty Twenty-Three theme
Now it’s time to customize your WordPress site using the new site editor. For this how-to, we will use the WordPress Twenty-Three theme. It is the default theme for new WordPress installations at the time of this writing. It may seem a bit barebones at first, but it loads fast, aligns with best practices, and is highly customizable.
From the dashboard, click “Appearance” and then “Themes.”

Launch the WordPress Full-Site Editor
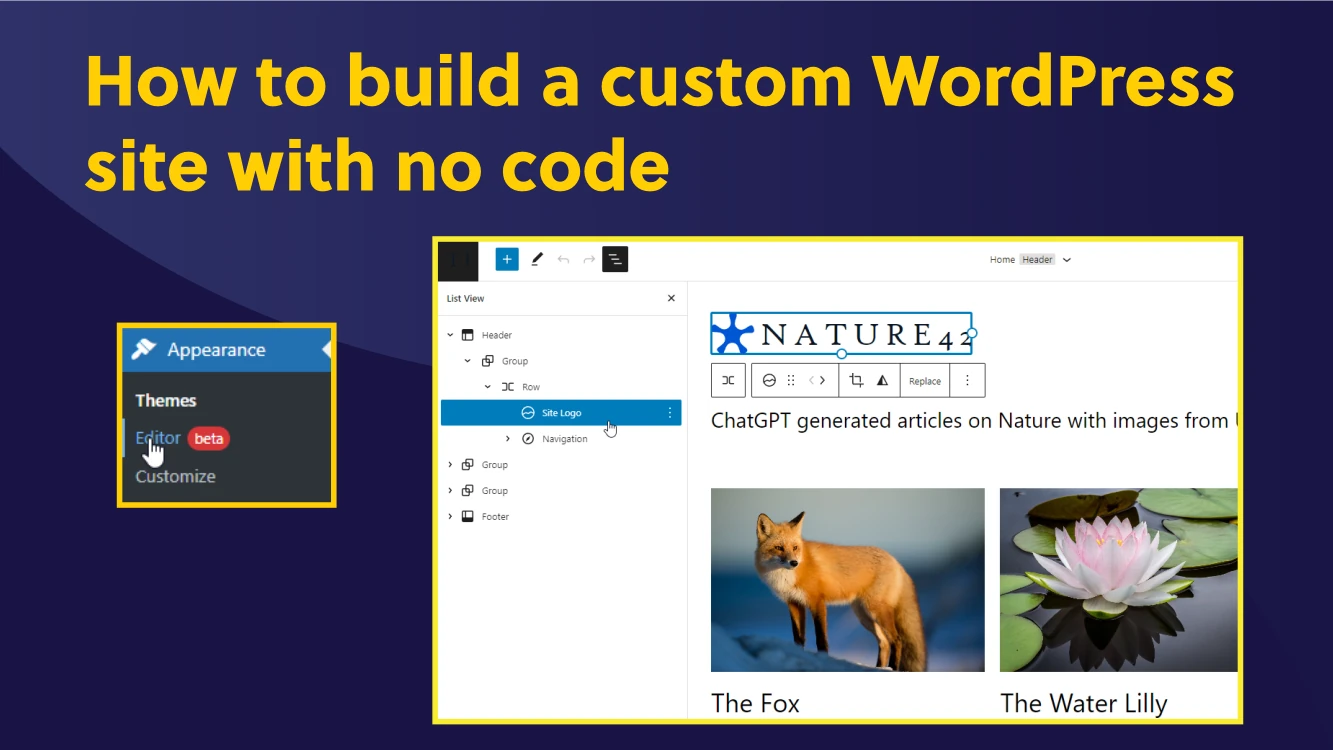
To access the WordPress full-site editor, log into the dashboard and click “Appearance” on the left-hand menu. As of this writing, the full-site editor is still in beta, but the beta flag may be removed when WordPress 6.2 is released.

By default, the editor will open your site homepage in the editor. Let’s cover a few basics before making changes.
Templates and Template Parts
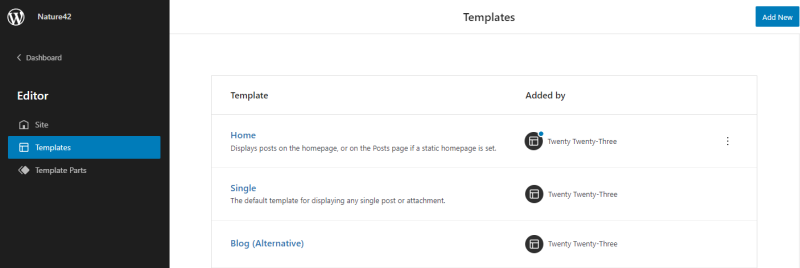
Click the WordPress logo in the upper left corner of the editor to display the templates. The editor provides a template for each page type in WordPress. Here are the more important ones, including descriptions from the editor:
- Single – “The default template for displaying any single post or attachment.”
- Page – “Displays a single page.”
- Home – “Displays posts on the homepage or the Posts page if a static homepage is set.”
In addition to templates, WordPress allows you to define “Template Parts.” These template parts can be used inside of page templates so you can include and modify common elements across your entire site in one place. For example, the “Header” will be used across all the different page types and will likely contain your site logo and navigation menu.
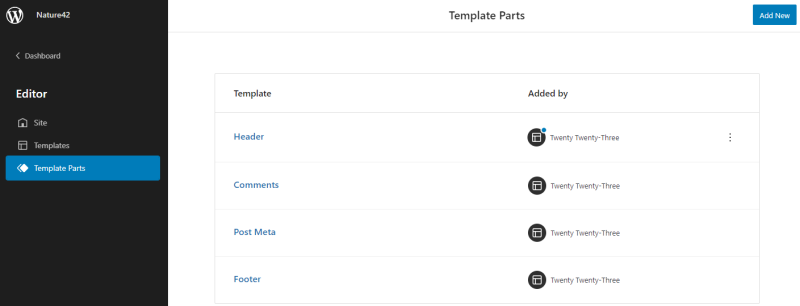
Once you’re done looking at the templates, click “Home” on the templates menu or 🏠”Site” to return to the home page view in the editor.
List View
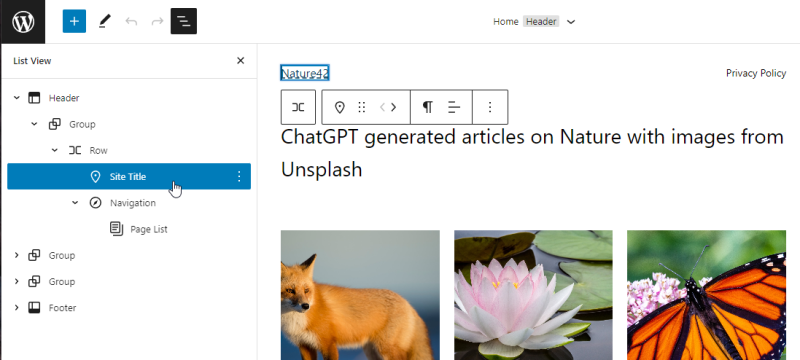
The editor allows you to select and modify different elements in each template. It can be challenging to tell which item you have selected when they are nested inside each other. The list view lets you easily see the hierarchy and choose the element you need. Click “List View” icon to open it up.
Global Styles
Styles allow you to change style combinations, colors, typography, and layout across your WordPress site. To launch Styles, click the half-moon icon in the upper right corner of the editor.

The WordPress Twenty Twenty-Three theme provides a number of preset styles you can try out. Click “Browse styles” and select a few of the different preset styles to see how they change the look of your site.
If you don’t like any of the preset styles, you can customize your own using the Typography, Colors, and Layout options.
Groups, Rows, and Column(s)
The WordPress editor allows you to organize your content into groups, columns, and rows. The list view feature is really helpful when editing these layout elements. As you examine the Twenty Twenty-Three theme, you’ll notice groups are used for the top-level elements that contain rows or columns.

Time to make some changes
Add a site logo
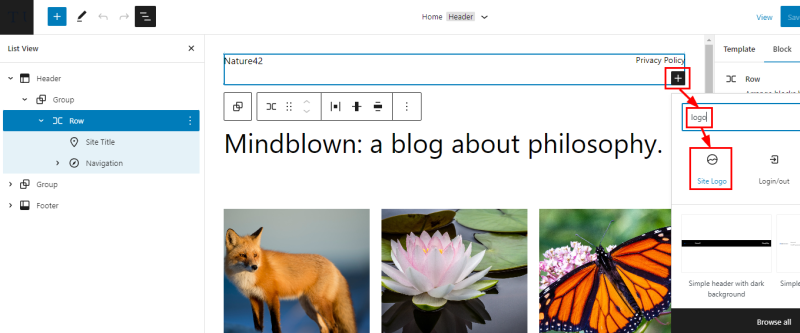
Start by replacing the site title with your a logo. Open the list view and select the row holding the site title. Click the plus in the lower right-hand corner of the row to insert a block. Search for “logo” to locate the “Site Logo” block and click it. Select an image from your media library or upload a new one.
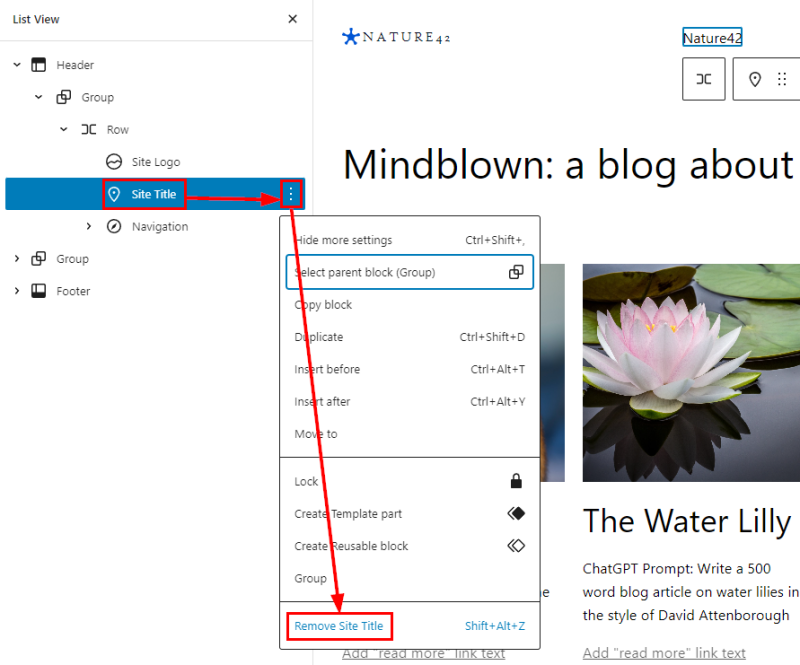
Once your logo is added, click the site title, the ellipsis, and “Remove Site Title.”
You can increase the size of the logo by grabbing one of the frame bubbles and dragging it out.

Remove the “Mindblown” heading and add a tagline
Add a tagline by clicking the “+” and adding a Group, Row, and Tagline, and then set the row to “Wide width.” See the screenshot below.

Delete the “Mindblow: a blog about philosophy.” heading by selecting the heading in the list view and then clicking “Remove Heading.”
Set the overlay opacity on the page template feature image to zero
In the site editor, click the logo in the upper left-hand corner, then “Templates” and the “Single” template. Select the post featured image at the top and set the overlay opacity to zero. Save your changes and open up one of the posts in a separate browser window to see your changes.

Further Customizations
WordPress provides a way to add your own custom CSS if the full site editor doesn’t provide access to a CSS property you want. In the site editor, click the block you want to add a class to in the list view, click the ellipsis, and then “Show more settings.”

This should open the block settings pane on the right. Scroll to the bottom of the settings pane and click “Advanced.” Enter any CSS class names you like separate by spaces under “Additional CSS Class(es)” and save your changes.

Open a new browser tab and enter “https://your-domain/wp-admin/customize.php” but replace “your-domain” with your actual domain. This should open a customization menu.

Click “Additional CSS” to open a text input box where you can enter any additional CSS you like.

Click the “Publish” button at the top of the page to publish your custom CSS.

The Create Block Theme Plugin
The WordPress site editor allows you to customize almost everything, but if you want to create your own theme, you can install the “Create Block Theme” plugin to create it from scratch. It also allows you to export your current theme, create child themes, overwrite the current theme, etc.


Conclusion
The WordPress site editor is a game changer. It gives you much more control over the look and feel of your website without editing your HTML and CSS manually. It will be interesting to see how this relatively new feature evolves over the next year.
Leave a Reply