
This tutorial is for anyone that needs to create a WordPress site quickly. You don’t need to be a WordPress developer or know all the jargon. I will walk you through the whole process.
For this tutorial, we will set up a WordPress instance on Virtual Private Server (VPS) host. VPS hosts are an excellent way to run your WordPress site because they allow you to add any functionality you need on the server. Many VPS hosting services now provide a one-click WordPress installation that makes installing WordPress a snap.
I will use DigitalOcean (DO) for this tutorial, but there are many other great VPS hosts. I picked DO because they are relatively inexpensive, and their 1-Click WordPress Marketplace option saves you a lot of time and hides much of the complexity. To set expectations, the cheaper plans cost less than $10 per month when I write this. In case you’re wondering, I don’t receive any incentives for recommending DigitalOcean. Let’s get started!
Register a domain name
Before you build your WordPress site, you will need a domain name. To reach your site, people will enter this in their web browser URL bar. I.e., (fireflywp.com) I am not going to sugarcoat it: finding a good, short domain name is tough. I have found Instant Domain Search to be helpful. Also, do a quick Google search once you come up with a name to ensure it is not associated with anything negative.
Once you have found an available domain name, you must pick a registrar service to register it. Note that the company you register your domain name with doesn’t need to be the same company you host your WordPress instance on. Here are a few places where you can register your domain:
- Namecheap
- https://www.shopify.com/domains
- https://aws.amazon.com/route53/
- https://www.godaddy.com/
- https://www.cloudflare.com/products/registrar/
Expect to pay around $12 per year, depending on the extension you want (I.e., .com). Be careful: Some domain services will offer a discount for the first year to bring you in and a much higher fee each year after.
Once you have registered your domain name, you need to point it to DigitalOceans’s name servers. As of this writing, they are:
- ns1.digitalocean.com
- ns2.digitalocean.com
- ns3.digitalocean.com
DigitalOcean conveniently describes how to do this on various registrars here: https://docs.digitalocean.com/tutorials/dns-registrars/
In the example below, I entered the DO names servers for the domain “pictosearch.com,” which I registered on AWS Route53:
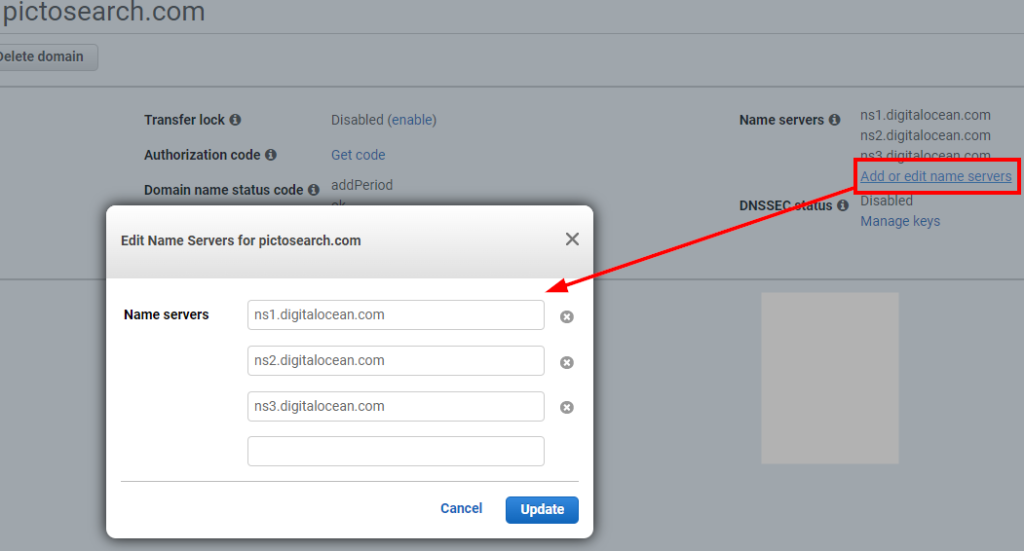
It might take a few minutes for the registrar complete this, but we don’t need to wait around.
Sign up for an account on DigitalOcean (DO)
I am not going to walk you through this step because it is pretty self-explanatory, but here are a few things you should know:
- DigitalOcean (DO) has a pay-as-you-go model. You pay for the services you use, so there is no cost just to sign-up.
- DO calls a VPS server a “Droplet.” I will be using this term from now on.
- You can create and destroy Droplets as you like and will only be charged for their running duration.
Here is the link: https://www.digitalocean.com/
Setup a Droplet for WordPress
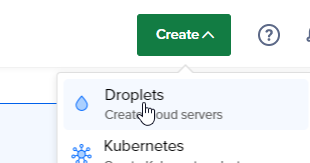
After logging into your DigitalOcean (DO) dashboard, click the “Create” button at the top of the screen and choose “Droplets.”
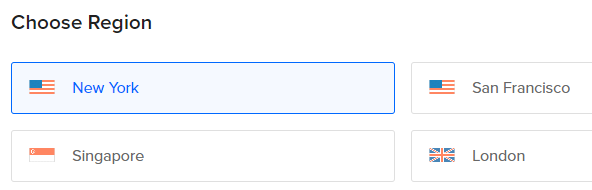
On the following screen, choose a region close to your intended audience. These are locations where DO has data centers, so your site will load a fraction of a second faster. In my case, I chose “New York.”
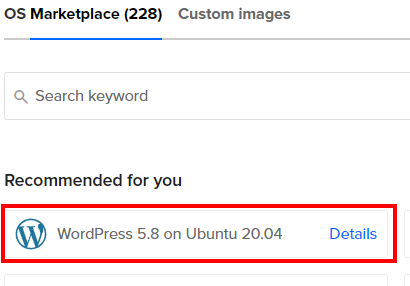
Under “Choose an image,” click “OS Marketplace” and choose “WordPress 5.8 on Ubuntu 20.04” or the latest version available. DO may offer a managed database cluster, but we will skip this step.
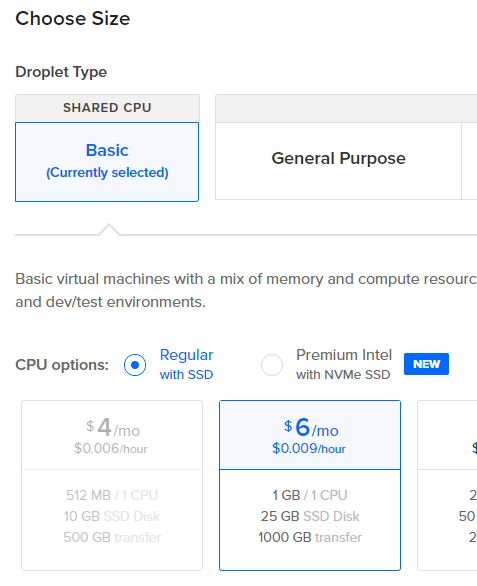
Under “Choose Size,” I chose the Basic, Shared CPU option and the “Regular with SSD,” $6/mo image. This should be adequate for most new blogs, and you can upgrade later if you need to.
Under “Choose Authentication Method,” choose “Password.” Make your password long and complex, and save it for later. The SSH Key method is more secure but can be challenging to set up your first time.

DO may offer free monitoring for the Droplet, so I added it but will skip the backup option because I will be backing up my instance using UpdraftPlus.
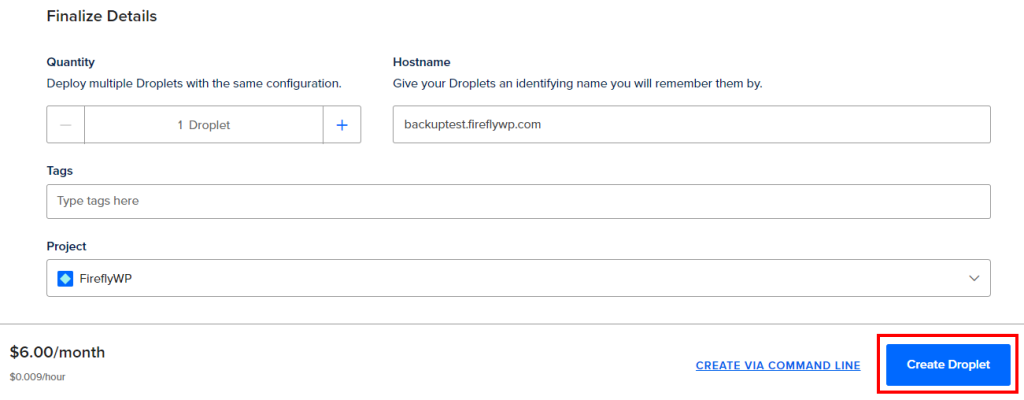
Under “Finalize Details,” you can set a hostname (whatever you like), skip the Tags, and if everything looks good, click “Create Droplet.”
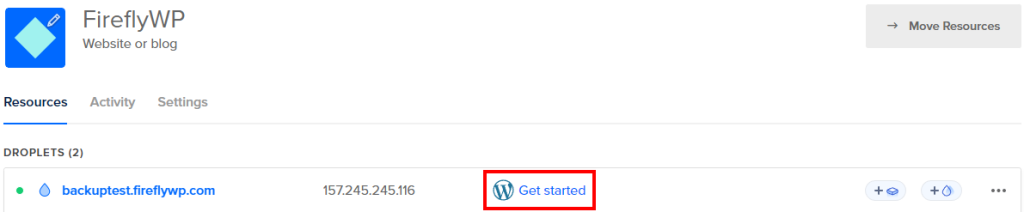
DO will take a minute or two to build your droplet. When it’s done, you should see an IP address assigned to your new Droplet and a link with the WordPress logo that says “Get started.”
If you have made it here, pat yourself on the back! You have built a little virtual server in the cloud!
Point your domain at your new Droplet
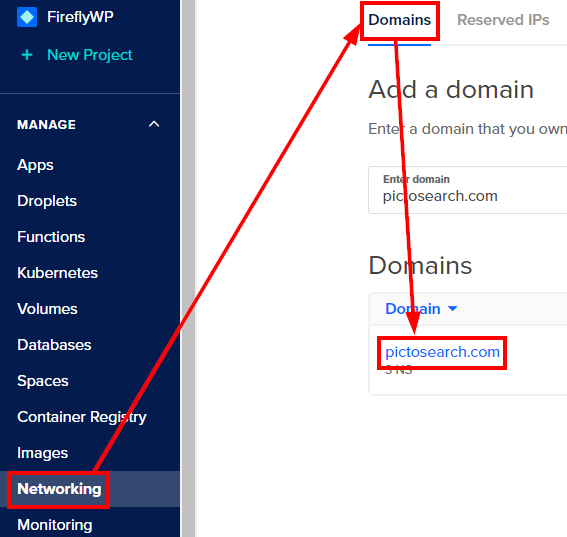
Click “Network” on the left-hand menu, then “Domains” and the domain you set up earlier.
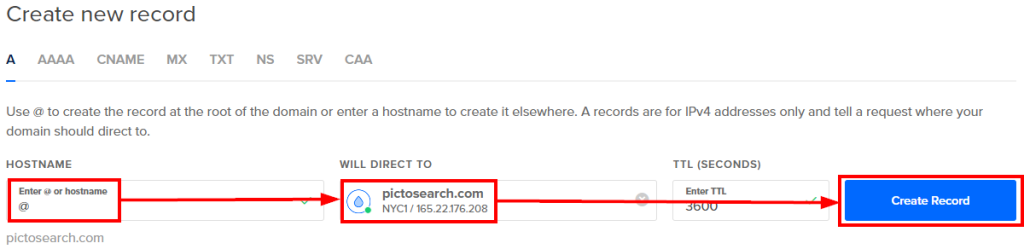
On the “Create new record” screen, enter the “@” symbol for the hostname, select your Droplet under “Will Direct To,” and then “Create Record.”
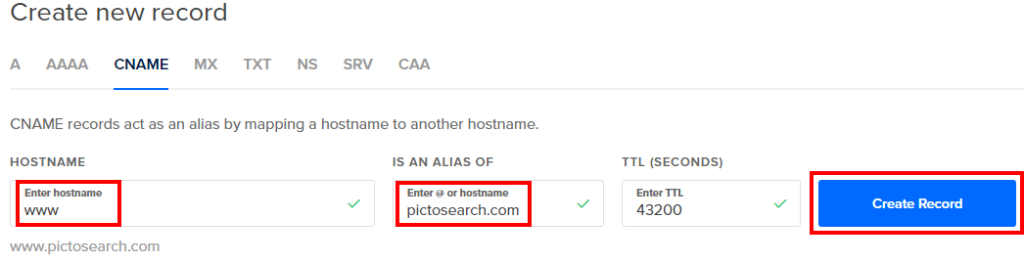
Now let’s create a “cname” record so people will still get to your site if they type “www” before your domain name. Select the “CNAME” tab. Type “www” for the hostname, your domain name without “www” for “Is An Alias Of,” and then click “Create Record.”
Your domain name is now pointed at your new Droplet.
Configure your shiny new WordPress instance
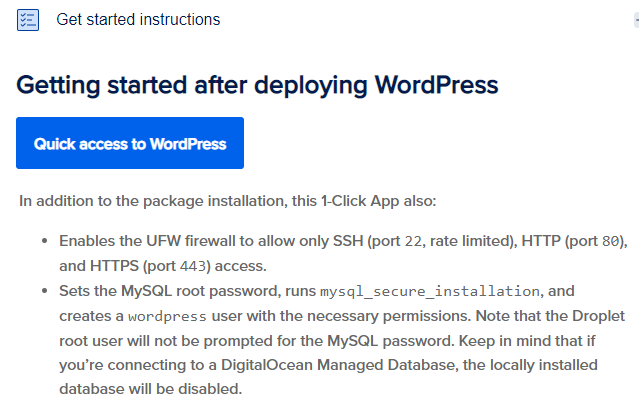
Click on “Droplets” in the left-hand menu to return to the Droplet screen. Click on the “Get started” link on your Droplet row to review what DO has done for you with the 1-Click WordPress install. You don’t need to understand all of it right now, but this is where I think DO provides a lot of value because you didn’t have to do all that tedious work.
Once you are done looking at this page, click the “X” in the upper left to close it out and return to your Droplet.
STOP HERE! Before you continue, make sure your A record is pointed at your Droplet IP address per the previous section. If it is not, WordPress will have trouble finding itself and LetsEncrypt won’t be able to verify you own the domain and setup SSL/TLS (HTTPS).
Click on the name of your Droplet to open up the Droplet details page:

Click “Console” on the details page to log into your server.

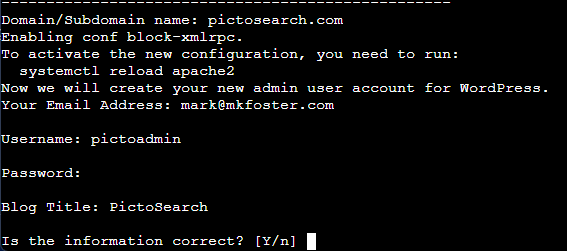
This will open a command prompt in a browser window. This command-line stuff can be a little intimidating if you have never done it before, but I’ll take you through it step-by-step:
- Enter your domain name (I.e., example.com) when prompted for a Domain/Subdomain name.
- Enter your email address when prompted.
- Pick a username to log into WordPress with and enter it when prompted.
- Enter a complex password you will use with WordPress and save it for later.
- Enter a title for your site when prompted for “Blog Title.”
- Enter “Y” if everything is correct.
Next, we will install a certificate provided for free by LetsEncrypt as a service of the Electronic Frontier Foundation (EFF). This step is needed to enable HTTPS. This will also set up a certificate bot (Certbot) that will automatically renew your certificate. This used to be an expensive, painful process, so many thanks to EFF folks!
Why HTTPS? HTTPS, with an extra emphasis on the “S” for Secure, is pretty much mandatory these days. Google uses HTTPS as a “ranking signal” to help determine how well your site ranks on their search results. Even if you aren’t running a bank, HTTPS is the right thing to do and will inspire more trust in your content or product.
- You will be asked if you would like to use “LetsEncrypt” to configure HTTPS. Type “y” to confirm.
- Enter your email address when prompted
- Enter “A” if you agree to the terms of LetsEncrypt
- When asked if you want to share your email with the EFF, choose yes or no.
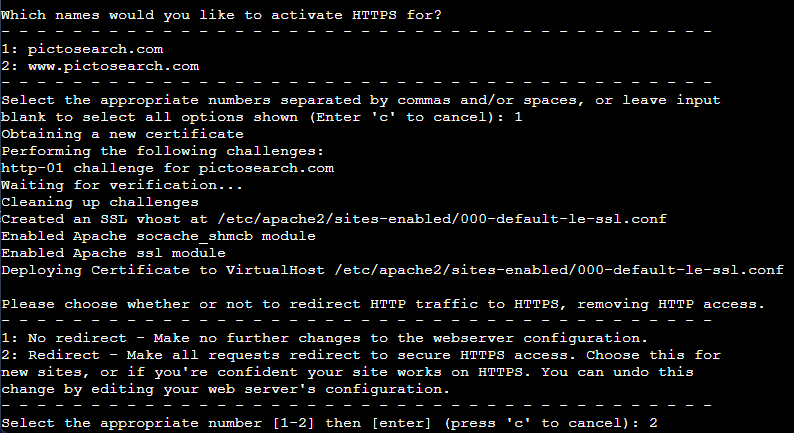
- You will be asked which names you would like to activate HTTPS for. Enter “1” for the bare name (apex name). The CNAME DNS record we entered earlier will send anyone who types “www.” before your domain name to the right place, so we don’t need to activate HTTPS for that case.
- You will be asked if you want to redirect HTTP traffic to HTTPS, removing HTTP (no S) access. Choose option 2 to do the Redirect to ensure we provide the most secure browsing experience.
You should see an “Installation complete” message if everything went well.
Test your new site in a web browser!
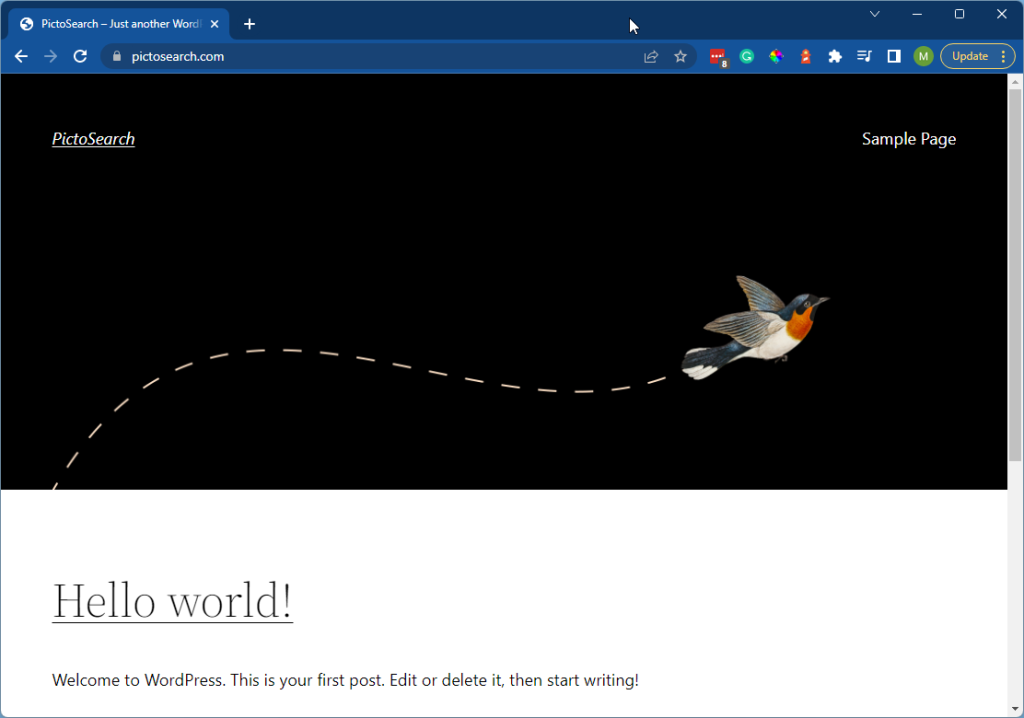
Fingers crossed! Open a web browser, type your domain name into the URL bar (I.e., pictosearch.com), and press enter. You should see your new WordPress site with the current default theme.
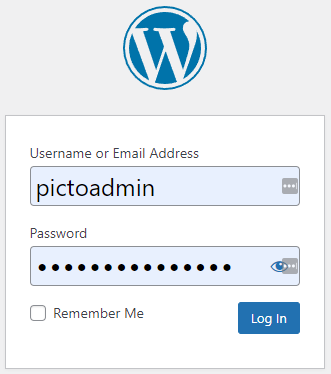
Now it’s time to log in to your new WordPress site! Your login URL will be your plus “wp-login.php.” I.e., “example.com/wp-login.php.” Enter the username and password you set up earlier on the command prompt.
First thing: Update WordPress to the latest version. Click “Dashboard,” “Updates,” and then “Update to version x.x.x.” WordPress should update itself to the latest version. Go back to updates and update anything else that says it needs updating.
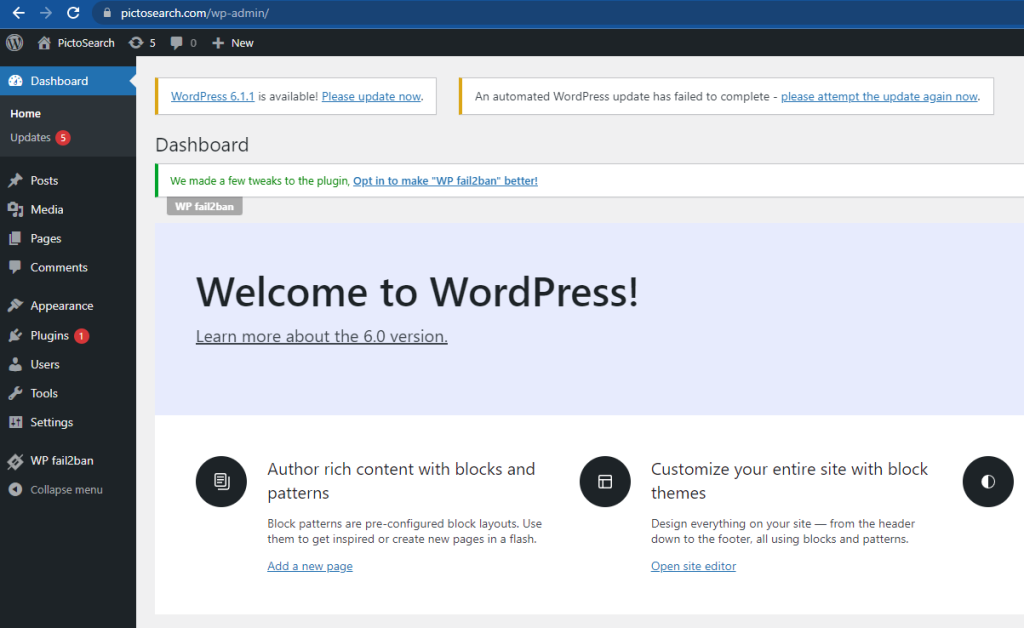
Once everything is updated (when you see no more red circles), you are ready to customize the look of your site and add content.
If you are not ready for Google to index your site, you might want to use the “Discourage search engines from indexing this site” option. Click “Settings,” “Reading,” and then check “Discourage search engines from indexing this site” and click “Save Changes.”
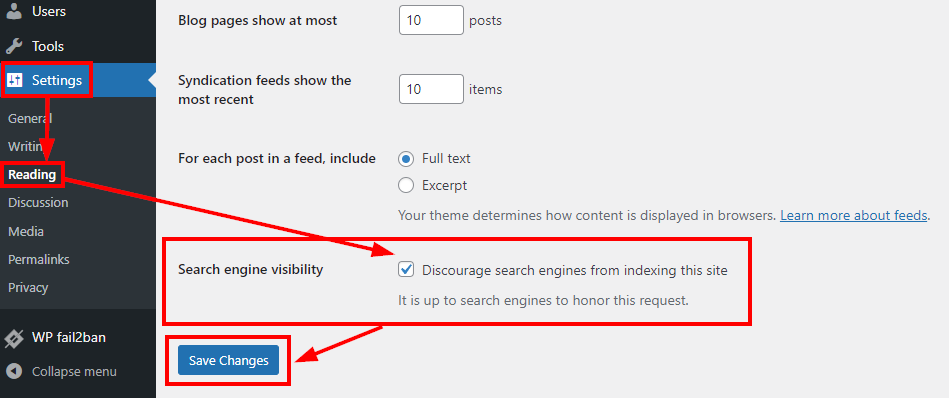
Don’t forget to uncheck this when you are ready go.
Permalinks setting for SEO (Search Engine Optimization)
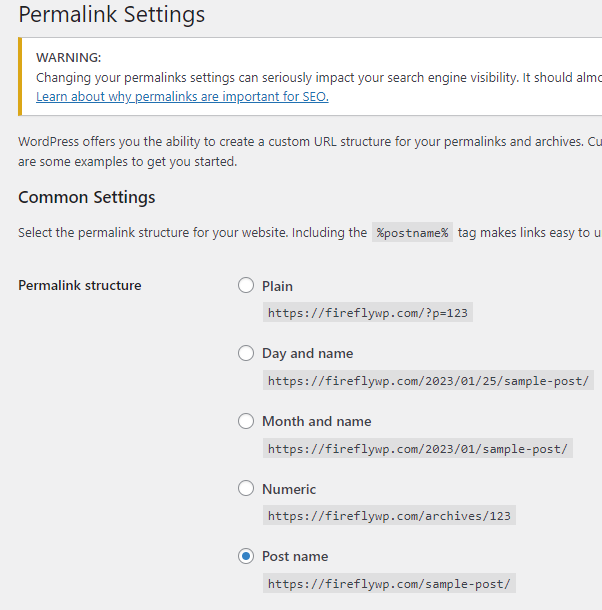
A permalink is a URL to an individual post in WordPress. The default is plain: I.e., “https://fireflywp.com/?p=123” The index number “123” doesn’t tell you what you can expect to see when you click the URL.
The alternative preferred by many SEO folks is to use the post title like this: “https://fireflywp.com/how-to-create-a-wordpress-site-in-less-than-an-hour/” This format helps set expectations on what content someone can expect to find at the URL when they click the link without any other context.
To change the format, log into the WordPress dashboard, click “Settings” -> “Permalinks” -> and then choose “Post name” for the “Permalink structure” as shown below.
The downside is that you must be committed to that post title once you publish. If you change the title and the permalink, it can throw the search indexing bots for a loop.
WordPress Basics
A full WordPress tutorial is outside the scope of this article, but here are the basics:
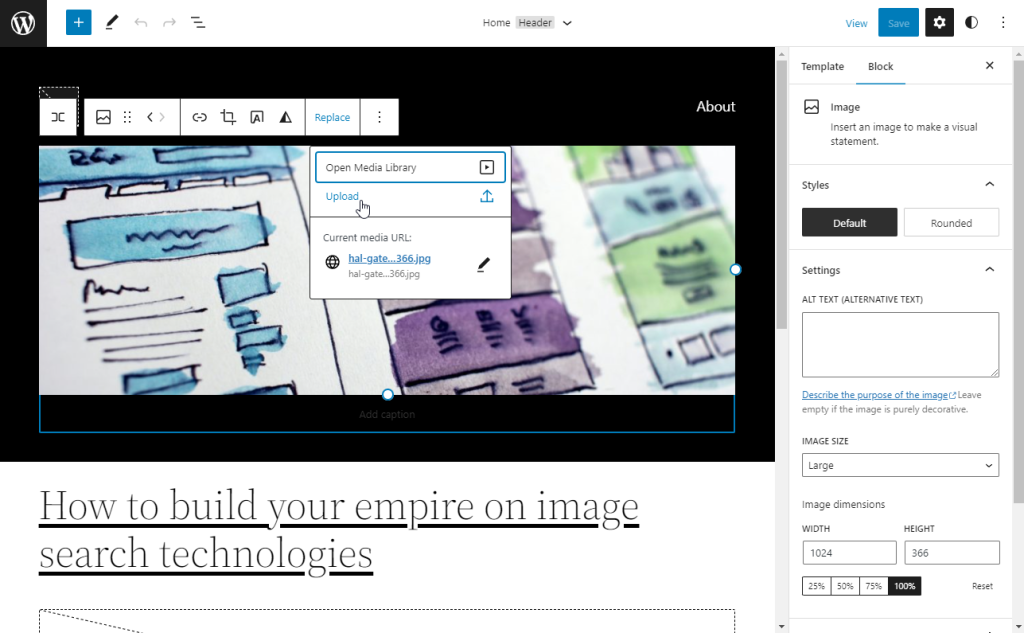
WordPress now offers full-site editing to customize the look and feel of your site. Traditionally you would have installed third-party themes or premium page-builder add-ons to customize your site. If you are willing to invest a little time, full-site editing gives you many creative options without the expense. To try it, click “Appearance” and then “Editor.”
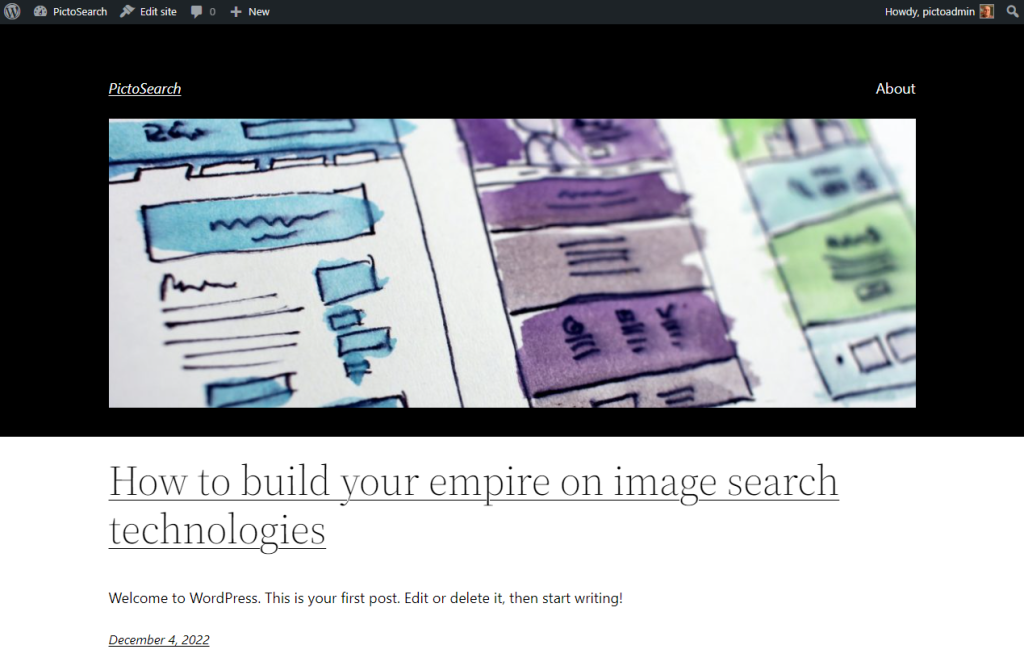
In WordPress, you have posts and pages. Posts and pages are pretty similar, except when you make a page, a link is added to the navigation bar. Posts are your blog entries typically listed on your home page in reverse chronological order. You will probably only have a few pages, so your navigation menu doesn’t become cluttered, and quite a few more posts as you add content. Pages are typically used for an “About” section, privacy policies, contact info, and anything else you want pinned to your site navigation. The best thing to do is try them both out.
In the example below, I added an “About” page, renamed the first post, and changed the cover image using the site editor.
Care and feeding of your Droplet
Ubuntu OS
Your new Droplet is running Ubuntu LTS (Long Term Support). Ubuntu is a modern Linux OS that requires little maintenance. It will
update itself, but sometimes it may need a restart to apply updates. Set a reminder every month or two to log into the server and restart it:
- Log into DigitalOcean
- Select your project and then click on your Droplet
- Click “Console” on the details page to log into your server.
- Check for any new messages on the login screen. If the server needs a restart to apply an update, it will tell you so. If so, type “reboot” to restart the server. If not, type “exit” to close the shell prompt.
- The reboot should only take a few seconds but keep in mind the website will not be accessible during that time.
WordPress
WordPress should keep itself up to date, but it is important to log in and check periodically to ensure it is doing so. Make sure to enable auto-updates for all your plugins on the Plugins screen.

Backups
Click here to learn how to back up WordPress using the UpdraftPlus plugin.
Keep your site fresh
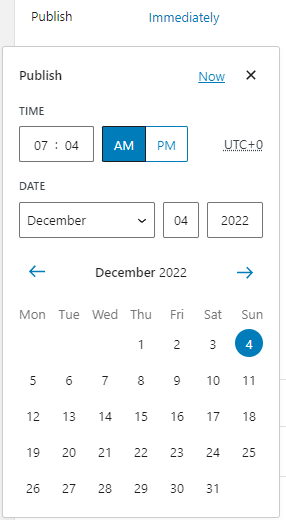
I am the worst person in the world to give this advice, but here it is: If you are running a blog, keep your site fresh by adding new content regularly. Pick a day of the week to publish new content. One powerful feature of WordPress others lack is publishing on a schedule. You can write all your posts for the next month two on a single day and then schedule them to publish on specific days. I would argue this is one of the many features that makes WordPress stand out from other CMS/Blogging tools.
Final thoughts
Owning a site on the web is empowering, and congratulations on taking this step. Please use this power for good. 🙂 Comment below if you found this article helpful or have any corrections. -Mark
Leave a Reply